Sourdough Starter
- Eric Kraus
- personal
- 27 Mar, 2024
Introduction
Let me first say, I am by no means an expert. However, the one thing I am is persistent .
Like me, you will probably fail at this a few times. Like many things in life, enjoy the process, learn from these mistakes, and keep going - it’s worth it!
This guide organizes all my research and is geared towards someone who knows very little about sourdough or making a starter.
The good news here is the cost of failure for a sourdough starter is relatively low. And most times, you can reflect on your mistakes while still eating a fantastic tasting, somewhat flat, loaf of bread!
Table of Contents
- Understanding Your Starter
- Understanding Ratios and Acidity
- Building Your Starter
- Maintaining Your Starter
- Preparing to Bake
- Essential Tips
- Troubleshooting
Understanding Your Starter
Before diving into the process, let’s understand what we’re actually creating and how it works.
The Three Phases
There are essentially 3 phases your starter goes through:
- Building Your Starter - Creating your initial starter (this is done once)
- Maintaining Your Starter - Regular feeding to keep it alive and healthy
- Preparing to Bake - Making a levain for your recipe
Lifecycle of a Starter
When you combine water and flour, initially…nothing happens. But as you repeat this process, the mixture will begin to capture natural yeast from the air and those little yeast are hungry for some food (flour). They begin consuming the flour, reproduce exponentially, and as a byproduct give off carbon dioxide.
Every time you add flour and water to your starter you are giving the existing yeast cultures more food to consume and multiply. This will all be visually present in your starter as it grows in height and develops lots of air bubbles.
After the yeast have consumed as much food (flour) as they can, they begin dying off and the acidity of the starter begins to change. During this process, there are also some negative byproducts. The biggest one is acidity, which begins to build up and eventually ‘smothers’ the yeast, preventing them from eating and multiplying further.
At this point, you will notice the starter’s height stall out and eventually begin to lower back to its original height. This stall period is referred to as the “peak” and at max height, it a nice dome at the top…JUST BEFORE it begins to drop.
Once a starter has fallen back to its original height, it still contains a lot of yeast and bacteria, but also contains a lot of acidity which we don’t want.
Learn More
For more detailed information on the lifecycle of the starter, I highly recommend The Sourdough Journey .
Understanding Ratios and Acidity
Ratios Explained
You’ll see mention of ratios throughout this guide — they are very important. A ratio (e.g. 1:1:1) represents the relationship of quantities:
EXISTING STARTER : TOTAL NEW FLOUR :WATER
How much existing starter you decide to keep and the ratio you use will dictate how much new flour and water you add.
Examples:
- 50g existing starter with 1:1:1 ratio = 50g existing starter + 50g flour + 50g water
- 20g existing starter with 1:1:1 ratio = 20g existing starter + 20g flour + 20g water
- 20g existing starter with 1:5:5 ratio = 20g existing starter + 100g flour + 100g water
Why Different Ratios Matter
We don’t need to keep much existing starter to maintain a healthy culture—something like 20-30g should be plenty. However, we can adjust the amount of existing starter and the ratio (and temperature) to control several things:
Total Quantity: Adjusting the existing starter amount and ratio dramatically alters the quantity of active “peak” starter you’ll have.
Lifecycle Duration: A 1:1:1 ratio will complete a full cycle quickly. Because of this, there is a shorter time window where the starter is at peak. Where as a 1:5:5 ratio, it takes much longer to cycle, giving you a longer peak window of several hours, making timing more flexible to someone with a busy life - but it’s also more wasteful if you don’t need that much starter.
Reduce Acidity: Higher ratios (1:3:3 or 1:5:5) dilute residual acidity by creating more active starter relative to the acidic portion carried over.
My Preference
I’ve found 1:3:3 (30g existing, 90g flour, 90g water) takes about 12 hours in my kitchen, which works perfectly for twice-daily feeding.
The Role of Acidity
Acidity can play both positive and negative roles in your starter:
Positive Effects of Acidity
- Microbial balance: Rising acidity (lower pH) helps acid-tolerant lactic acid bacteria outcompete spoilage bacteria
- Flavor development: Lactic and acetic acids give that signature “sour” tang
- Safety: Keeping pH in the 3.8–4.5 window suppresses harmful microbes
Negative Effects of Acidity
- Fermentation rate: Very low pH (below ~3.5) slows yeast activity
- Gluten handling: Excessive acid can make dough sticky or hard to stretch
Building Your Starter
This is the first step in the process During this phase you are capturing initial yeast and bacteria from the air in your kitchen. Be patient during this phase—don’t set expectations, just follow the plan!
Day 1
- Add 100g Whole Grain Rye flour to jar
- Add 125g filtered water (75-80°F) to jar
- Mix until dry parts incorporated
- Lightly cover jar and place in warm area (70-80°F) for 24hrs
Day 2
You may/may not see any fermentation activity. No worries.
- Add 75g of previous day’s starter into a new jar (discard the rest)
- Add 50g Whole Grain Rye flour to jar
- Add 50g Bread flour to jar
- Add 115g filtered water (75-80°F) to jar
- Mix until dry parts incorporated
- Lightly cover jar and place in warm area (70-80°F) for 24hrs
Day 3
You may/may not see any fermentation activity. No worries.
- Repeat Day 2 steps into a new jar
Day 4
You should be seeing fermentation activity by now. If not, double-check your measurements and temperatures. We begin 2x/day feedings now.
Morning (~7:00am)
- Repeat Day 2 steps into a new jar (let rest 12 hours)
Evening (~7:00pm)
- Repeat Day 2 steps into same jar (let rest 12 hours)
Pro Tip
Add water first and use it to help clear the jar with your scraper.
Days 5-6
- Repeat Day 4 routine (2x daily) in same jar
Congratulations! You now have a baby starter! I call this a “baby” because up to this point we’ve been using a 1:1:1 ratio, which may carry over acidity. As we transition to maintaining, I highly recommend experimenting with higher ratios like 1:3:3 and 1:5:5.
Maintaining Your Starter
Most experts agree that feeding 2x daily is ideal, which aligns with the expected 12-hour cycle duration of a 1:3:3 ratio.
Lower Maintenance Option
It’s technically possible to feed a starter 1:1:1 once every other day to keep it on life support, but you risk acidity buildup and low yeast population. If you do this, work it back up to 1:3:3 or 1:5:5 a few days before baking.
Daily Feeding (1:3:3 Ratio)
- Keep 30g existing starter in same jar (discard the rest)
- Add 90g filtered water (80°F) to jar and mix with existing starter
- Add 30g Whole Wheat Flour to jar
- Add 60g Bread Flour to jar
- Mix thoroughly (1-2 minutes until dry parts incorporated)
- Lightly cover jar and place in warm area (70-80°F) for 12hrs
Longer Storage (Refrigerator Method)
For longer periods between baking or vacations, store your starter in the fridge. Cold temperature massively slows yeast activity—what might be a 12-hour cycle could become 5-10 days!
Example Schedule:
- Saturday morning: Feed starter, let sit 1-2 hours to start fermentation, then refrigerate
- Thursday morning: Remove from fridge, place in warm location
- Thursday evening: Feed
- Friday morning/evening: Feed twice
- Saturday morning: Make levain and proceed with baking
Preparing to Bake
A levain is nothing more than a “child” or clone of your starter used solely for baking. Rather than use your entire starter for one loaf, you create an offshoot that’s ready in about a day.
Building Your Levain
Your recipe should specify the levain requirements, but if it only lists a total quantity (say 150g), use your ratio to work backwards:
- 1:1:1 ratio: Divide total by 3 (50g existing + 50g flour + 50g water)
- 1:2:2 ratio: Divide total by 5 (30g existing + 60g flour + 60g water)
Ratio Choice
1:1:1 is fine for levains since you’ll use it right at peak so you don’t have to worry about acidity. It’s also the fastest to cycle. Higher ratios work too but take longer to cycle.
Essential Tips
- Use a calibrated scale that measures in grams
- Record jar weights (write on paper or jar itself)
- Use filtered water only - tap water contains chlorine that inhibits yeast
- Get silicone jar scrapers for mixing and cleaning jar sides
- Add water first - mix with existing starter before adding dry ingredients
- Keep jars clean - swap to new jar every few days to prevent dried starter buildup
Troubleshooting
Even with the best intentions, sourdough starters can be finicky.
Remember...
Most starter problems resolve with patience and consistent feeding. When in doubt, keep feeding your starter regularly for a few more days before making drastic changes.
Here are the most common issues you’ll encounter and how to address them:
Starter Not Rising or Rising Too Quickly
Symptoms: Little to no height increase, minimal bubbling activity
Solutions:
- Be patient - This is the #1 issue for beginners. Some starters take 7-10 days to show consistent activity
- Check your environment - Ensure consistent temperature (70-80°F). Try moving to a warmer spot
- Verify your flour - Whole grain flours (rye, whole wheat) ferment faster than white flour
- Check your water - Chlorinated tap water can inhibit yeast growth. Switch to filtered water
- Increase feeding frequency - Try feeding twice daily if you’re only feeding once
Symptoms: Rapid rise followed by collapse within a few hours
Solutions:
- Overfermentation: You’re missing the peak window - check more frequently
- Too warm: Move to a cooler location to slow fermentation
- Adjust ratio: Try 1:2:2 or 1:3:3 for a longer, more stable peak
- Flour type: Whole grain flours ferment faster - consider using more bread flour
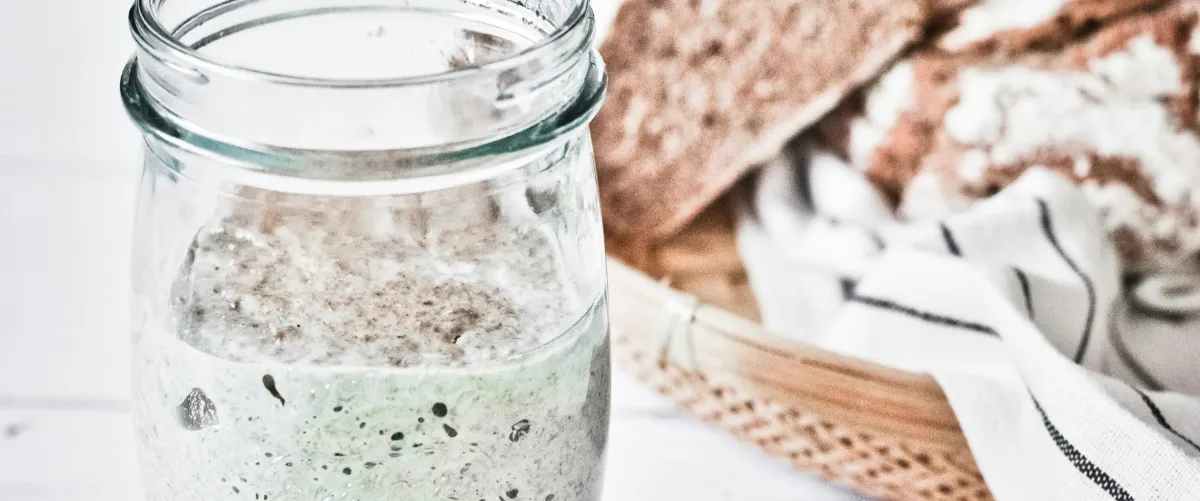
Funky Smell, Liquid Layer on Top, or Mold
Symptoms: Smells like alcohol, acetone/nail polish remover, or vinegar. Dark liquid separating on top
Normal
This is completely normal - the liquid is called “hooch” and indicates your starter is hungry
Solutions:
- You can stir it in for more sour flavor, or pour it off for milder taste
- Very vinegary: Normal but indicates high acidity - try higher ratios (1:3:3 or 1:5:5)
- Feed more frequently - This usually means your starter needs food more often
- Increase your ratio - Try 1:2:2 or 1:3:3 instead of 1:1:1
Symptoms: Putrid/rotten smell. Fuzzy growth (usually green, black, or white) on surface
Solutions:
- Discard immediately - Do not try to save a moldy starter
- Start over - Mold indicates contamination that can’t be fixed
- Prevention: Keep jars clean, use clean utensils, maintain proper ratios
Safety First
Mold is different from hooch. Mold is fuzzy and sits ON TOP of the starter. When in doubt, throw it out and start fresh.
Dough Doesn’t Rise During Fermentation
Symptoms: Flat, dense dough that won’t hold shape or rise properly
Solutions:
- Starter timing: Use your starter at peak activity (doubled in size, domed top)
- Starter strength test: Drop a spoonful in water - it should float when ready
- Reduce acidity: Feed your starter with higher ratios (1:5:5) for several days before baking
- Temperature check: Ensure your dough is in the right temperature range (75-80°F for bulk fermentation)
- Give it more time: Sourdough fermentation takes much longer than commercial yeast
When to Start Over
Sometimes it’s better to start fresh:
- Visible mold growth
- Persistent putrid odors that don’t improve with feeding
- No activity after 2+ weeks of consistent feeding
- Contamination from using dirty utensils
Don’t feel defeated if you need to start over - even experienced bakers occasionally lose a starter. Each attempt teaches you something new about the process!
Summary
Well, that’s it! Just kidding—it’s just the beginning!
The best way to learn is to do, make mistakes, and analyze your results. Every kitchen is different, every starter develops its own personality, and every baker learns their own rhythm.
Be patient with yourself and enjoy the process.
Your future self (and family) will thank you when you’re pulling beautiful, aromatic loaves from your oven.
I wish you the best of luck on your sourdough journey!